'2015/01'에 해당되는 글 31건
- 2015.01.28 데스크톱용 Goole 드라이브 제거
- 2015.01.28 Median xl 2008 LEVEL CHALLENGE 가이드
- 2015.01.27 Median xl 2008 HEROIC LEVELS 가이드
- 2015.01.27 Median xl 2008 UBERLEVELS 가이드
- 2015.01.27 Median xl 2008 DUNGEON UBERQUESTS 가이드
- 2015.01.26 디아블로2 메디안 xl 2008 활네크 디스트럭션 진행중.
- 2015.01.26 출혈하는 내치핵
- 2015.01.26 메디안xl 2008 아마존 파이어, 아마존 활, 쓰레기 소서 120 세이브
- 2015.01.23 median xl 2008 SUMMONING UBERQUESTS 가이드
- 2015.01.22 Diablo2 median xl ubber quest level challenge guide, save
Median xl 2008 LEVEL CHALLENGE 가이드
물론 초보자라면... 그냥은 챌린지가 힘들것이다.
편법으로 속성(attribute)를 1씩 올려주는 러닝도장(signet of learning)을 충분히 먹으면 도전할 수 있을 것이다. 최대 500개까지 먹을 수 있다. (공유인벤토리 파일에 포함시켜 두었음)

==> 이건 꼭 할만한데..
아사신 50레벨로 하면 독데미지 기술 하나로 모두 제거할 수 있다.
50레벨이 되자 마자 Halls of the Dead Level 3 (Dry Hills) 로 달려가서 세명의 아마존을 쓰러뜨리면 된다.
물론 가기 전에 호라드릭 큐브에 포털스크롤, 아이덴파이스크롤을 하나씩 넣고.. 인벤토리에 2쌍 더 챙겨가야 한다.
지도를 참고할것!!
병사들과 똑같이 생겨서 잘 구별이 안되는데.. 아마존이 여럿 생기는 마법을 쓰는 녀석이 있으면 주변에 여왕이 있다고 보면 된다.
여왕이 쓰러지면 캐릭터 주변에 환이 생기는데 이때 보석을 주워서 호라드릭 큐브에 넣어 돌리면 추가 업그레이드를 받는다. 30초는 넉넉하기 때문에 너무 서두를 필요 없다.


==>
이건 약간의 트릭이 있는데..
120으로 풀로 키운 캐릭터로 가서 캐릭터 참을 주으면 된다.
그리고 새로 캐릭터를 만들어서 그 캐릭터에게 참을 주고 아무 jewel을 같이 호라드릭 큐브에 넣고 돌리면 캐릭터 참 완성!!.


HEROIC LEVELS
Abandon all hope, ye who enter here. Similar to ordinary demons but much stronger and more intelligent, heroic demons are more than a match for the toughest heroes.

Median XL features four heroic areas:
Act 1 Mausoleum (Burial Grounds)
Act 2 Stony Tomb Level 1 (Rocky Waste)
Act 5 Icy Cellar (Ancients' Way)
Each of the three areas contains the same 20 heroic monster types. You may want to choose the area that suits your character build the most.
Act 1 Cow Level (Rogue Encampment)
Meet invisible cow ninjas, bovine summoners and other figments of your fever dreams after a bad case of food poisoning in the Cow Level!
HEROIC BOSSES
Each heroic area is protected by its own guardian. The area's heroic boss may randomly appear in the area, or he may not... Beware, heroic bosses are among the hardest encounters in Median XL.
All heroic bosses are protected by an invulnerability shield. This shield is nearly impossible to break with mortal magic but will occasionally fail and drop a random immunity, though this still leaves the boss with high resistance to this element. Use these rare opportunities well.
|
Belial
Level |
Location Lore Strategy Reward
Keep in Inventory to gain Bonus Required Level: 60 +(51 to 500) to Life +(51 to 500) to Mana
|
|
Bull Prince Rodeo
Level |
Location Lore Strategy Reward
Keep in Inventory to gain Bonus Required Level: 100 +(-10 to 40) to all Attributes Total Character Defense Plus (11 to 15)% 5% Reanimate as: Random non-elite monster -75% Less Gold from Monsters (31 to 40)% Better Chance of Getting Magic Items
Killing Rodeo does not prevent you from entering the Cow Level again. |
|
Quov Tsin
Level |
Location Lore Strategy Reward
Keep in Inventory to gain Bonus Required Level: 120 +(21 to 30) Energy Factor to Spell Damage +1 to All Skills +(41 to 50) to Strength +(41 to 50) to Dexterity +(41 to 50) to Vitality +(41 to 50) to Energy (21 to 25)% Bonus to Summoned Minion Damage (11 to 15)% Bonus to Summoned Minion Resistances
2% chance to drop a trophy on Destruction difficulty. Cube the trophy with the charm for a small bonus. |
|
Astrogha
Level |
Location Lore Strategy Reward
Keep in Inventory to gain Bonus Required Level: 120 +1 to All Skills +500 to Life Poison Length Reduced by 50%
2% chance to drop a trophy on Destruction difficulty. Cube the trophy with the charm for a small bonus. Warning! Due to a bug with the way Diablo II handles champions, there is a chance Astrogha may spawn as a boss pack with several copies of himself as minions. When you see a mass of doom spiders, run for your life and restart the game. |
UBERLEVELS
The ultimate challenge of Median XL, these levels are much harder than any regular level and will challenge even the strongest heroes. Your reward on Destruction difficulty is a unique charm!
|
1/8 Kurast 3000 BA
Level |
Location Lore Enemies Bosses Reward
Keep in Inventory to gain Bonus Required Level: 40 +50 Crafting Points +(21 to 25) Energy Factor to Spell Damage Total Character Damage Plus (0.25 per level)% (Based on Character Level)
On any difficulty, the Ennead Necromancers drop a random class charm in addition to their regular drop. You need your class charm for other challenges and uberquests. Class charms Sacred Sunstone: Amazon class charm A new class charm has the following bonuses. +1 to Light Radius More bonuses can be added with the Horadric Cube after completing further challenges. Drop Bias |
==>
세트 아이템이 자잘하지만 많이 떨어지는 곳이라서 디스트럭션 필수 사냥터.. 여기서 세트 아이템을 장비하면 나머지 uberquest에 도전하는데 도움이 된다. 세이크리드 유닉 아이템도 가끔 나온다.. 이건 별도로 자세히 설명해두었다..
그리고 클래스참이 나오는데.. 이건.. 약간 편법을 쓰면 고레벨이 되어서도 쓸 수 있다. 클래스 참이 나오면.. 그걸 새로운 캐릭터를 만들어서 업그레이드 한 다음 다시 원래 케릭터로 전달하면 된다.
|
2/8 Island of the Sunless Sea
Level |
Location Lore Enemies Bosses Reward
Keep in Inventory to gain Bonus Required Level: 60 Adds (101-150)-(151-250) Fire Damage Adds (101-150)-(151-250) Lightning Damage Adds (101-150)-(151-250) Cold Damage Fire Resist +(21 to 25)% Lightning Resist +(21 to 25)% Cold Resist +(21 to 25)%
Defeat Lucion on Destruction difficulty to get the Sunless Crystal Bird.
Keep in Inventory to gain Bonus Required Level: 60 -(6 to 15)% to Enemy Fire Resistance -(6 to 15)% to Enemy Cold Resistance -(6 to 15)% to Enemy Lightning Resistance -(6 to 15)% to Enemy Poison Resistance 5% Chance of Crushing Blow -5 to Light Radius
Drop Bias |
==>
소환퀘스트로 인벤아이템을 챙기고 나서 하면 꽤나 수월하게 해결할 수 있다. 적이 보이지 않지만.. 맵에 시체토템이나 용병을 소환하면서 전진하면 아무 문제가 없다. 지도가 약간 길고 복잡하지만. 양갈래 길을 각각 따라가면 말릭, 루시온이 나온다.
|
3/8 Khalimgrad
Level |
Location Lore Enemies Bosses Reward
Keep in Inventory to gain Bonus Required Level: 80 +(16 to 25)% to Experience Gained (6 to 10)% Bonus to All Attributes +2 to Light Radius
Drop Bias |
|
4/8 Tran Athulua
Level |
Location Lore Enemies Bosses Reward
Keep in Inventory to gain Bonus Required Level: 50 Adds 15-20 Fire Damage -(6 to 10)% to Enemy Fire Resistance +10 Defense
Keep in Inventory to gain Bonus Required Level: 50 Adds 15-20 Cold Damage -(6 to 10)% to Enemy Cold Resistance +10 Defense
Keep in Inventory to gain Bonus Required Level: 50 Adds 15-20 Lightning Damage -(6 to 10)% to Enemy Lightning Resistance +10 Defense
Defeat the elemental priestesses on Destruction difficulty to get the Sunstone of the Gods (1/6 chance from each priestess).
Keep in Inventory to gain Bonus Required Level: 100 Adds (51-100)-(101-150) Fire Damage Adds (51-100)-(101-150) Lightning Damage Adds (51-100)-(101-150) Cold Damage Increase Maximum Life (11-15)% Increase Maximum Mana (11-15)%
2% chance to drop a trophy on Destruction difficulty. Cube the trophy with the charm for a small bonus. Drop Bias |
==>
해볼만 하다. 지도가 복잡하지만..

이대로 따라가면 된다..
50레벨 캐릭을 만들어서 불, 번개, 얼음 보석을 획득하고. (독내성은 없으므로 레벨 50 아사신의 독공격을 이용하면 아주 편리하다.)
120레벨 캐릭으로 신의 선스톤을 획득하면 된다.
|
5/8 Fauztinville
Level |
Location Lore Enemies Bosses Reward Fauztinville on Destruction difficulty is the only place where you can find the following three Great Runes. These runes are required for the most powerful runewords.
Drop Bias |
|
6/8 Ghosts of Old Bremmtown
Level |
Location Lore Enemies Bosses Reward (requires your class charm) [Class Charm] + Arcane Crystal -> returns [Class Charm] w/ added bonuses
This upgrade recipe adds the following bonuses: Amazon: uses Sacred Sunstone Assassin: uses Shadow Vortex Barbarian: uses Worldstone Orb Druid: uses Caoi Dulra Fruit Necromancer: uses Soulstone Shard Paladin: uses Eye of Divinity Sorceress: uses Nexus Crystal |
|
7/8 Kingdom of Shadow
Level |
Location Lore Enemies Bosses Reward
Keep in Inventory to gain Bonus Required Level: 120 +(1 to 2) to Amazon Skill Levels +(1 to 2) to Assassin Skill Levels +(1 to 2) to Barbarian Skill Levels +(1 to 2) to Druid Skill Levels +(1 to 2) to Necromancer Skill Levels +(1 to 2) to Paladin Skill Levels +(1 to 2) to Sorceress Skill Levels +500 Maximum Stamina
2% chance to drop a trophy on Destruction difficulty. Cube the trophy with the charm for a small bonus. |
|
8/8 Duncraig
Level |
Location Lore Enemies Bosses The secret Reward
Keep in Inventory to gain Bonus Required Level: 100 +(0 to 2) to Amazon Skill Levels +(0 to 2) to Assassin Skill Levels +(0 to 2) to Barbarian Skill Levels +(0 to 2) to Druid Skill Levels +(0 to 2) to Necromancer Skill Levels +(0 to 2) to Paladin Skill Levels +(0 to 2) to Sorceress Skill Levels Replenish Life +50
2% chance to drop a trophy on Destruction difficulty. Cube the trophy with the charm for a small bonus. Drop Bias |
DUNGEON UBERQUESTS
Small dungeons inhabited by a greater evil just waiting for you to enter its realm. Prepare well before entering an uberquest area.
|
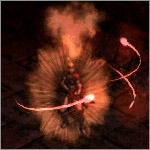
1/8 Creature of Flame
Level |
Location Lore Strategy Reward
Keep in Inventory to gain Bonus Required Level: 40 (3 to 5)% Life stolen per Hit (3 to 5)% Mana stolen per Hit -50 Defense +(21 to 25) to all Attributes
In older versions of Median XL, this encounter did not have the death touch mechanic. The increased difficulty may come as a surprise. |
==>
쉽다. 로스트 시티에 돌아다니다 보면.. 사막가운데 판으로 덮힌 구멍이 있는데.. 여기로 가면 된다.
거의 맛보기 처럼 간단히 해결가능.
|
2/8 Infernal Machine
Level |
Location Lore Strategy Reward
Keep in Inventory to gain Bonus Required Level: 60 +200 Crafting Points +2 to Light Radius
|
==>
조금 어려운데... 타워의 위치가 중요하다.
타워가 입구에서 너무 멀리 반대쪽에 있으면.. 접근하는 동안 적이 너무 많이 생겨서 불가능한 게임이 된다.
다시 시작하길 반복해보면.. 타워가 입구에 바짝 붙어서 위치하는 경우가 있다. 이때.. 가까이 들러붙어서 소환병들을 불러내면.. 타워가 적을 많이 소환하지 못하게 되어서.. 좀 수월하게 끝낼수 있다.
즉... 어려우면 다시 시작하면 된다.
|
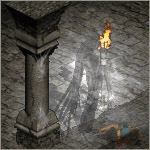
3/8 Death Projector
Level |
Location Lore Strategy Reward
Keep in Inventory to gain Bonus Required Level: 80 Increase Maximum Life 10% Increase Maximum Mana 10% +(6 to 15)% to Experience Gained
|

==>
약간의 요령이 필요.. 검은 병사들은 불사신이라서 상대하느라 시간 소모할 필요없다.. 오히려 소환병과 시체토템으로 복도에 정체시켜두기 좋다. .. 죽음의 레이져는 정해진 방향으로만 오므로.. 대략 외곽으로 넓게 돌면 맞지 않는다. 그리고.. 검은 병사들이 프로젝터 주변에 있어야.. 절대방어가 해제되므로 너무 멀리 검은병사들을 유인해선 안된다..


프로젝터의 위 아래에는 이렇게 사각이 존재한다.
여기에 잘 숨어서 왔다갔다하면서 프로젝터를 꺠면 된다..
..
포털을 열어두고 왔다갔다하면서 서서히 제거할 수 도 있다.


|
4/8 Azmodan
Level |
Location Lore Strategy Reward
Keep in Inventory to gain Bonus Required Level: 100 All Resists +(31 to 40)% +5% to All Maximum Resistances Reduces Vendor Prices 10%
2% chance to drop a trophy on Destruction difficulty. Cube the trophy with the charm for a small bonus. |
==>
상당히 어렵다. 생명력을 높이는 세팅을 하고 나서.. 우선.. 버틸 수 있다면 방의 제일 아랫쪽 끝까지 들어가본다.
네크로 시체 토템을 계속 만들면서 버티다보니.. 올레지가 풀리는 놈들이 있는데..계속 죽이다보면 수가 좀 줄어든다. 적의 쪽수가 줄 면.. 그 위쪽의 방에 가서 버티다보면 아즈모단이 맞아서 죽는다.
아즈모단은 면역이 없기 때문에 약하지만.. 적이 너무 많아서 일점사가 참으로 어렵다..
네크는 산탄 마법이 있으므로 꽤 도움이 된다. ..
아마도 소환퀘스트를 다 마치고 인벤토리 아이템을 챙겨둬서 업그레이드가 되어야만 해볼수 있는 듯 하다.
|
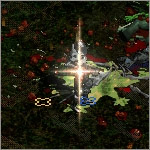
5/8 Rathma Square
Level |
Location Lore Strategy Reward
Keep in Inventory to gain Bonus Required Level: 100 10% Increased Attack Speed 10% Faster Cast Rate (21 to 150)% Bonus to Attack Rating Regenerate Life +(11 to 40)
2% chance to drop a trophy on Destruction difficulty. Cube the trophy with the charm for a small bonus. |
==> 조금 알면 쉽다.
고어란 놈들은 죽여도.. 그 자리에서 다시 재생한다.
시체를 토템으로 소모해도 생겨나는듯하다.
하지만... 소환수로 가득채워서 원거리 사격으로 제거하면서 진행하면 된다.
그리고.. 유튜브 영상을 보고 알았지만... 입구에서 왼쪽(화면의 오른위쪽방향)으로 나가서 내려가면 아래쪽으로 방이 있는데 여기에 주인공이 있다. 방안에 안들어가도 된다. 그냥 입구에서 산탄 마법 화살을 쏟아붇고 나면 끝.

..
위의 보라색 네모의 자리에 서서아래쪽 방향으로 갈겨대면.. 어느순간 적이 죽어있다. 아이템만 주으면 된다.
|
6/8 Cathedral of Vanity
Level |
Location Lore Strategy Reward
Keep in Inventory to gain Bonus Required Level: 100 15% Increased Attack Speed 15% Faster Cast Rate 15% Faster Hit Recovery 15% Faster Block Rate 15% Faster Run/Walk Cannot Be Frozen
2% chance to drop a trophy on Destruction difficulty. Cube the trophy with the charm for a small bonus. Bonus quest |

==>
토템처럼 생긴 수정구슬이 제단 앞에 있다. 여기서 나오는 죽음의 광선은 Death projector나 마찬가지다.
이걸 피하거나.. 제단같은 은폐물 뒤에 있어야 하는데..
컨트롤이 안되는 나는 안된다..
|
7/8 Toraja
Level |
Location Lore Strategy Reward Crystalline Flame Medallion + Arcane Crystal -> returns Crystalline Flame Medallion w/ added bonuses
This upgrade recipe adds the following bonuses:
All Resists +10% Regenerate Life +100
Toraja on Destruction difficulty is the only place in the game where you can find the following three Great Runes. These runes are required for the most powerful runewords.
|
|
8/8 Vizjun
Level |
Location Lore Strategy Reward
Keep in Inventory to gain Bonus Required Level: 100 5% Chance to cast level 10 Time Strike on striking 100% Chance to cast level 59 Blast Wave when you Die +(11 to 50) to Strength +(11 to 50) to Dexterity +(11 to 50) to Vitality +(11 to 50) to Energy
2% chance to drop a trophy on Destruction difficulty. Cube the trophy with the charm for a small bonus. Drop Bias |

=============================

 _LOD_SharedStashSave.zip
SUMMONING UBERQUESTS
For a hunter like you, the demons infesting Sanctuary may seem easy to destroy. If you want to test your skill against the mighty beings of ancient times, cast a summoning spell to pull them back from the dead.
As any sorcerer knows, in order to summon a creature you need a Book of Summoning. Creat one by cubing three Sacrifical Hearts and three Meditation Candles.
Meditation Candle x3 + Sacrifical Heart x3 -> Book of Summoning
The Book grants you a new skill icon. Select the icon and cast the skill in the right area to summon the boss.
|
1/8 The Butcher
Level |
Summon at Lore Strategy Reward
Keep in Inventory to gain Bonus Required Level: 40 50% Chance of Open Wounds +10 to all Attributes 100% Extra Gold from Monsters 40% Better Chance of Getting Magic Items
In older versions of Median XL, this was a straightforward melee fight. The invulnerability shield may come as a surprise. |
==>
블랙마쉬에도 홀이 있다. 찾아보면 포카튼 타워 말고도 구멍이 하나있다.
쉽다. 코맨트가 필요없을 정도다. 홀의 끝까지 내려가면 아주 좁은 방이 나오는데.. 여기 구석에서 소환할 수 있는 걸 다 하고 나서 ..
버쳐를 소환하면 버쳐가 친구?들에게 둘러싸여 정신못차리고 있으므로 멀리서 때리면 끝.
|
2/8 The Binding of Baal
Level |
Summon at Lore Strategy Reward
Keep in Inventory to gain Bonus Required Level: 60 +(16 to 20)% to Spell Damage (16 to 20)% Bonus to all Attributes
|
==>로스트 시티의 포탈 옆에 보면 뱀골짜기 들어가는 곳이 가까이 있다.
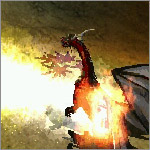
뱀골짜기 들어가서 .. 소환할 수 있는 것을 다 풀어낸다. 그리고 탈라샤를 소환한다.. 그러면 갑자기 자기 캐릭터가 바알로 변하므로 아주 당황하게 된다. 이때 우선 오른쪽이든 어디든 쭉 벗어나길 바란다. 탈라샤 가까이 가면 바알로 모양이 바뀌지만 능력은 그대로 유지된다.
활 네크로로 .. 시체 토템과 소환으로 일단 시간을 벌다보면 .. 탈라샤의 용병들이 흩어진다. 그때 하나씩 용병들을 잡고 나면 ... 탈라샤의 올면역이 풀린다. 잡으면 된다.
시행착오가 필요....
뱀 골짜기의 맵 자체가 돌이나 기둥같은 은폐물이 있으므로 엘리멘탈 공격을 피해야 한다. 데미지가 강해서 맞고 있으면 바로 끝난다.

예를 들어 왼쪽에서 탈라샤를 소환하고 오른쪽으로 이동해서 던전 입구 앞의 바위옆에 숨어있으면서 일단은 소환만 하면서 숨을 고르자. 그림속의 바알은 실제로는 네크로멘셔.
|
3/8 Assault on Mount Arreat
Level |
Summon at Lore Strategy Reward
Keep in Inventory to gain Bonus Required Level: 80 Total Character Damage Plus (41 to 50)% Total Character Defense Plus (21 to 30)%
|
==>
똑같다.
|
4/8 Akarat
Level |
Summon at Lore Strategy Reward
Keep in Inventory to gain Bonus Required Level: 100 +(201 to 250) Defense +(21 to 25) to all Attributes
2% chance to drop a trophy on Destruction difficulty. Cube the trophy with the charm for a small bonus. |
==> 생각보다는 수월하다.
Kurast Causeway는 업퍼 쿠라스트 에서 쿠라스트 사원으로 넘어가는 중간의 좁은 길인데..
몇마리있는 몬스터를 처치하고.. 가지고 있는 모든 소환수, 용병을 불러낸다.
그래고 구석에서 아카랏을 소환하고 다시 옆으로 빠져 나온다. 적당한 거리에서 원거리 공격을 쏟아부으면 어느새 끝난다..
팁은... 시체 타워가.. 가장 효과가 있는듯하다. 계속 병사를 만들어내어 잘 막아준다. 그리고 너무 가운데서 하면 소환된 아카랏이 둘러쌓여 몰빵을 맞으면 올레지스트가 생겨버려서 처치가 불가능해진다. 구석에서 소환하자.
|
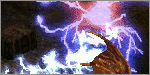
5/8 Lord Aldric Jitan
Level |
Summon at Lore Strategy Reward
Keep in Inventory to gain Bonus Required Level: 100 +(21 to 25) Energy Factor to Spell Damage Maximum Skill Level Increased by 1 +1 to Jitan’s Gate Half Freeze Duration
2% chance to drop a trophy on Destruction difficulty. Cube the trophy with the charm for a small bonus. |
==>
검은 구름이 생기기 시작하고 방어 타워가 생기면... 저도 모르게 어느새 피가 줄어서 죽는다..
생명만 신경쓰면서 .. 네크인 경우 시체 토템을 계속 만들면서 버티면 쉽게 끝낼 수 있다. 적당한 거리를 유지하는 것이 중요하다.
|
6/8 Legacy of Blood
Level |
Summon at Lore Strategy Reward
Keep in Inventory to gain Bonus Required Level: 100 (2 to 4)% Life Stolen per Hit (2 to 4)% Mana Stolen per Hit Maximum Skill Level Increased by 2
2% chance to drop a trophy on Destruction difficulty. Cube the trophy with the charm for a small bonus. |
==> 생각보다 쉽다. 문제는 블랙마쉬에 있는 잊혀진 타워로 내려가는 중간에 있는 작은 방이 너무 좁다는 것이다.
블러드고램은... 오랜만에 보니 반가운데.. 시체 타워를 쓰거나 시체를 깔아두면 오히려 블러드골램이 늘어만 난다. 아래에 있는 이너콜리스터에서 Uldyssian 소환퀘스트를 먼져 하고 나서.. 얻을 수 있는 Edyrem 을 10명 소환하고 하는 것이 좋다.
Bartuc 은 절대 저항을 갖고 있지만 공격을 할 때 일시적으로 풀린다. 공격을 받으면 체력이 거의 바닥까지 떨어지는데 약을 계속 복용하면서 일단 블러드골램은 무시하고 Bartuc만 일점사 하면 쉽게 처치가능하다.
|
7/8 Judgment Day
Level |
Summon at Lore Strategy Reward
Keep in Inventory to gain Bonus Required Level: 120 +1 to Summon Edyrem Fire Absorb 10% Cold Absorb 10% Lightning Absorb 10%
2% chance to drop a trophy on Destruction difficulty. Cube the trophy with the charm for a small bonus. Bonus quest Crystalline Flame Medallion -> returns Crystalline Flame Medallion w/ added bonuses
This upgrade recipe adds the following bonuses:
+3 to All Skills +50 to All Attributes
|
==>
이것도 쉽다.
문제는 소환하자 마자 바로 잡지 않으면.. 이녀석이 계속 소환을 해대기 떄문에 처치불가능해진다.
이너콜리스트 포털로 통해 가서
왼쪽 아래 구석에 가서 소환수들을 모두 불러낸뒤에 Uldyssian을 소환하면 된다.
소환뒤에 적당한 거리에서 일점사로 빨리 제거한다.
생각보다 쉽게 끝나거나.. 끝내지 못하거나 둘중의 하나다.
|
8/8 Brother Laz
Level |
Summon at Lore Strategy Reward
Keep in Inventory to gain Bonus Required Level: 100 +1 to All Skills (51 to 75)% Enhanced Damage vs. Demons +50 Damage All Resists +(11 to 15)% (201 to 250)% Extra Gold from Monsters 5% Reanimate as: Groupie
2% chance to drop a trophy on Destruction difficulty. Cube the trophy with the charm for a small bonus. |
|
Secret: Inarius' Revenge
Level |
Summon at Lore Strategy Reward
Keep in Inventory to gain Bonus Required Level: 120 1% Chance to cast level 20 Death Spiral when Struck |
==>이건 위치를 특정할 수 없다.
youtube로 보면... ACT1의 성당에서 소환할 수 있는 거 같지만..
그게 아니라.. 스토니 필드에서 다크 우드로 넘어가는 언더그라운드 패시지(지하통로)의 다른 출구인 우버퀘스트로 진행하면 있는 곳이다.. 이 곳 자체가 꺠기 어려운 곳이라서..


